Quantcast
Channel: SAP FREE Tutorials
Viewing all 211 articles
Browse latest View live

How to install Android Studio on Windows 8

$
0
0

Hello everyone, in this blog we will show you how to install android Studio on windows 8 64 bit machine. Lets get started.

Step-by-Step Installation Procedure

1. Download the Android Studio from here https://developer.android.com/sdk/index.html.

Android Studio_1 Android Studio_2

2. Once the download is finished , double click on downloaded .exe file to start the installation.

3. Click on Next on the welcome screen.

Adroid Studio Installation Step-1
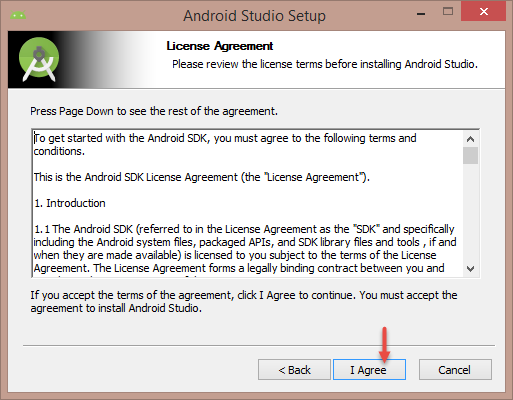
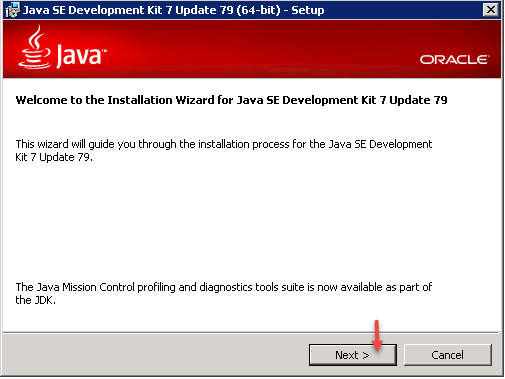
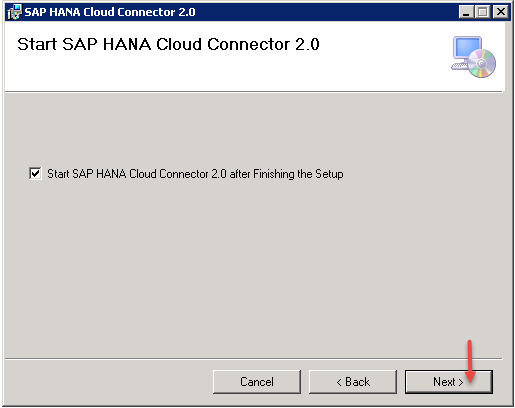
4. Select all components and click on Next.

Adroid Studio Installation Step-2

5. Accept the license agreement by clicking on I Agree button.

Adroid Studio Installation Step-3
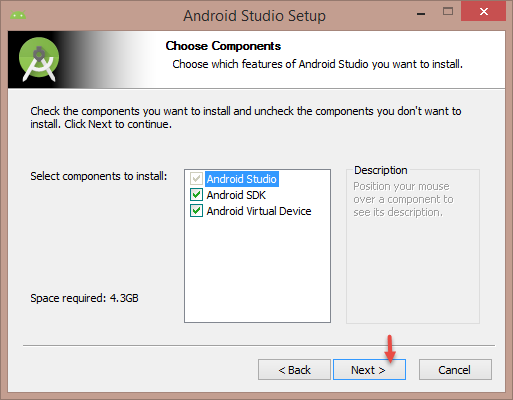
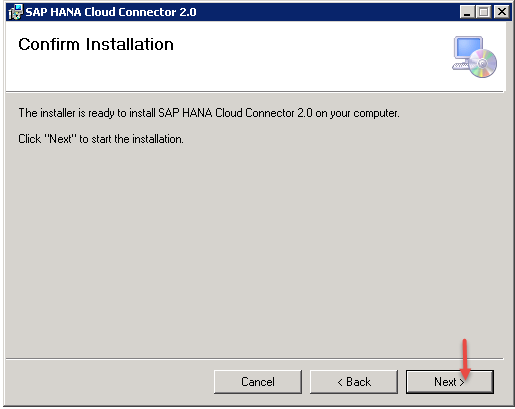
6. Verify the installation locations and click on Next.

Adroid Studio Installation Step-4
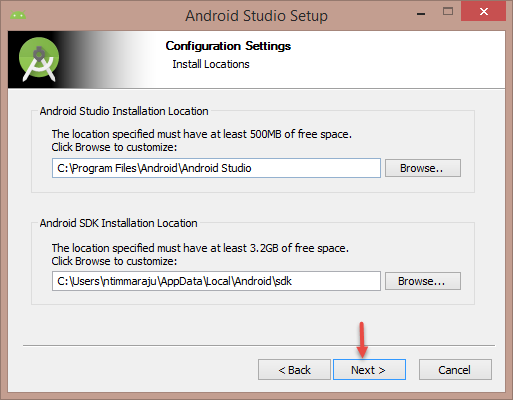
7. Choose start menu folder or leave it for default and click on Install to start the installation.

Android Studio Installation Step-5
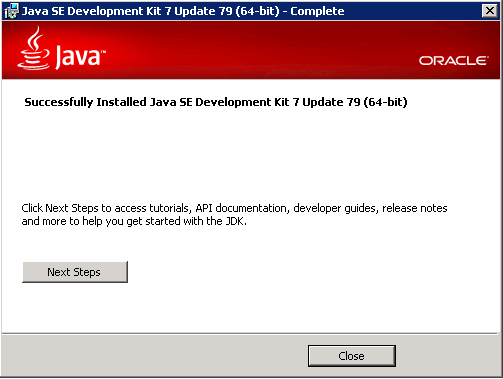
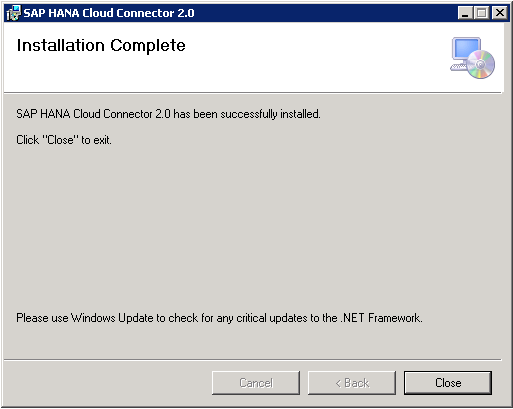
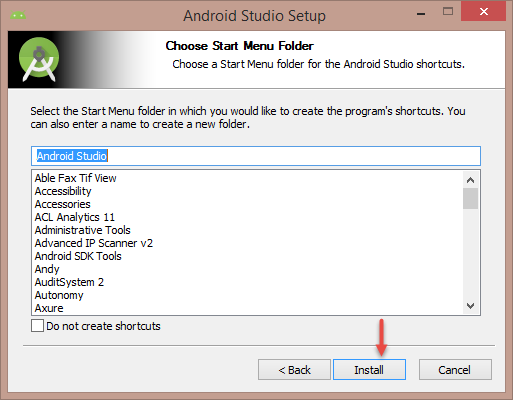
8. Installation will begin and it may take couple of minutes to complete the installation. After successful installation you should see the screen like below. Click on Next to complete the installation process.

Android Studio Installation Step-6
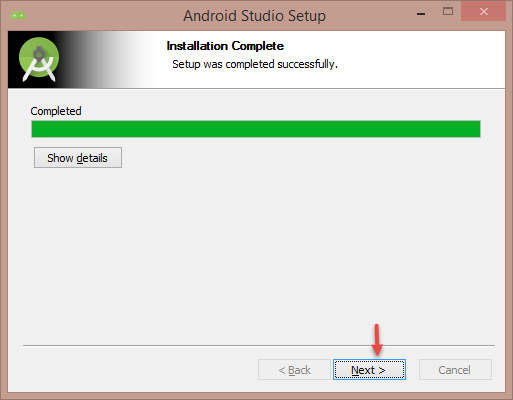
9. Launch the Android Studio, while launching you may see some additional components are getting installed wait for the the components to get downloaded. After that you can see the welcome screen like below.

Android Studio Installation Step-7
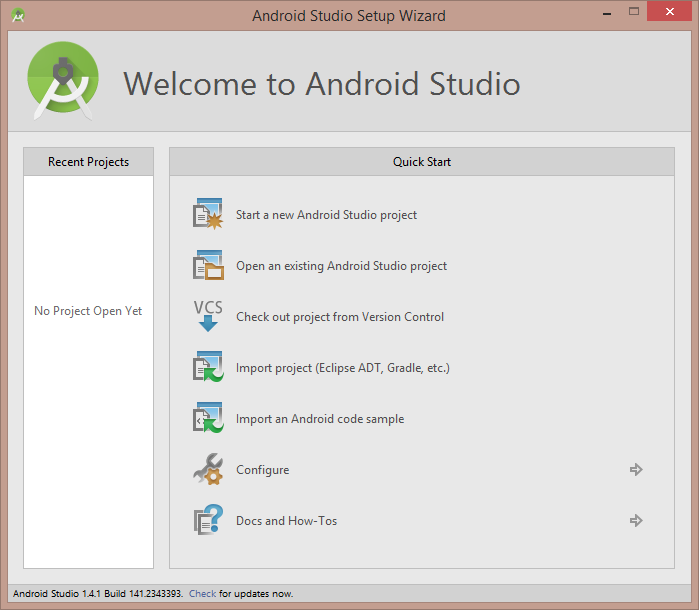
10. If you need any other packages to be installed, click on Configure which is on the welcome screen

Adroid Studio Installation Step-8
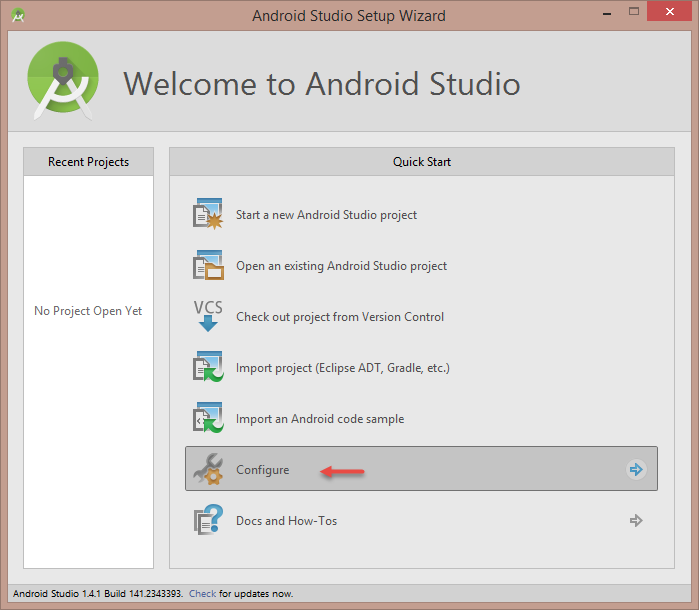
11. In the next screen click on SDK Manager to launch the SDK manager in which you can download additional packages.

Android Studio Installation Step-9

Congrats, you have successfully installed the Android Studio. Please stay tuned to us for more tutorials.

like-128

The post How to install Android Studio on Windows 8 appeared first on SAP Fiori,SAP HANA,SAPUI5,SAP Netweaver Gateway Tutorials,Interview Questions|SAP Learners.


How to install Java Development Kit(JDK) 8 on windows 8

$
0
0

Hello everyone, in this blog you will learn how to install Java Development Kit 8 on windows 8 64bit machine. Lets get started.

Step-by-Step Installation Procedure

1. Download JDK 8 or higher version software from the oracle downloads website. Click here to go the oracle download site directly. Choose your operating system and click on download link

JDK Installation Step-12. Once the download completed double click on the .exe file to start the installation.

3. Click on Next on welcome installation wizard.

JDK Installation Step-24. Click on Next.

JDK Installation Step-35. Extractor will start extract the necessary files for the installation.

JDK Installation Step-4 6. Choose the destination folder in which you want to install the JDK or leave it to default.Click on Next.

JDK Installation Step-57. JDK Installation process will start and you can see that in the progress window.

JDK Installation Step-68. After successful installation you should see the success window like below

JDK Installation Step-79. To test the JDK installation, open your windows command prompt and type “java -version” you should the version details like below

JDK Installation Step-810. Next step is to set the java environment variable “JAVA_HOME”, click here to know the step by step procedure.

Congrats you have successfully installed Java Development Kit on your local machine. Stay tuned to us for more tutorials. Please stay tuned to us for more tutorials.Please feel free to comment and let us know your feedback. You feedback will keep us alive.
like-128

The post How to install Java Development Kit(JDK) 8 on windows 8 appeared first on SAP Fiori,SAP HANA,SAPUI5,SAP Netweaver Gateway Tutorials,Interview Questions|SAP Learners.

How to set JAVA_HOME variable in Windows 8

$
0
0

Hello everyone, in this tutorial you will learn how to set JAVA_HOME variable in Windows 8. Lets get started.

Step-by-Step Procedure

1. Open Control Panel in Windows 8.

Control Panel
Control Panel

2. Select System and Security.

Select System and Security

3. You will be navigated to below screen. In this screen select System

Select System
Select System

4. You will be navigated to below screen. Now select Advanced system settings.

Select Advanced System settings

5. A new System Properties window will open. In the system properties window click on Environment Variables button.

System Properties
System Properties

6. In the Environment Variables window, hit New button under system variables.Enter

  • Variable name = JAVA_HOME
  • Variable value = C:\Program Files (x86)\Java\sapjvm_8.  This is the path in which your java SDK/JVM is stored.

JAVA_HOME settings7. Click on OK to close all the windows.

Congrats you have successfully set the JAVA_HOME system variable in Windows 8.

like-128

The post How to set JAVA_HOME variable in Windows 8 appeared first on SAP Fiori,SAP HANA,SAPUI5,SAP Netweaver Gateway Tutorials,Interview Questions|SAP Learners.

How to install SAP HANA Cloud Connector 2.0

$
0
0

Hello everyone, in this blog we will show you how to install SAP HANA Cloud Connector for establishing secure connection with on-premise systems. Lets get started.

Prerequisites

JDK 7 or higher needs to installed. Click here to see the JDK installation procedure.

Step-by-Step Installation Procedure

1. Download the cloud connector software from the SAP HANA Cloud Platform tools site. Click here to navigate to the site.

2. Navigate to the SAP HANA Cloud Connector section and choose your operating system and download the SAP Cloud Connector. In my case it is windows 64 bit machine.

SAP Cloud Connector Software3. Once the download is finished, double click on the MSI installaer to start the SAP Cloud Connector installation.

4. Click on Next on the welcome SAP Cloud Connector 2.0 setup wizard.

SAP Cloud Connector Step-15. Choose any install folder or leave it to default and click on Next.

SAP Cloud Connector Step-26. Choose the port number of your choice or leave it to default and click on Next.

SAP Cloud Connector Step-37. In the JDK Installation window, choose the folder in which you have installed the jdk software and click on Next.

SAP Cloud Connector Step-48. Click on Next.

SAP Cloud Connector Step-59. Click on Next to confirm the installation.

SAP Cloud Connector Step-610. SAP Cloud connector installation will start and it will take less than an minute to complete the installation. After successful installation you should the screen like below.

SAP Cloud Connector Step-711. To launch the cloud connector administration UI copy this URL https://localhost:8443 and paste it any browser. You should see the administration log in screen like below.

SAP Cloud Connector Login

Congrats you have successfully installed SAP Cloud Connector on your local machine.In our next blog you will learn how to connect backend systems with HANA cloud trail instance. Stay tuned for more SAP HANA Cloud tutorials. Feel free to let us know your comments.

like-128

The post How to install SAP HANA Cloud Connector 2.0 appeared first on SAP Fiori,SAP HANA,SAPUI5,SAP Netweaver Gateway Tutorials,Interview Questions|SAP Learners.

How to setup Initial Configuration in SAP Cloud Connector 2.0

$
0
0

Hello everyone in this blog you will learn how to setup initial configuration in SAP Cloud Connector 2.0. Initial configuration involves Login, Change your password and establish the connection to your SAP HANA Cloud Platform(Trail/Productive). Lets get started

Prerequisites

You should have installed SAP Cloud Connector 2.0. Click here to see the step-by-step installation procedure.

Step-by-Step Procedure

1. Log in to the SAP Cloud Connector by using the browser entering http://localhost:8443 and following screen will be displayed.

SAP Cloud Connector Login2. Please enter following credential to log in to the cloud connector.These credentials are default one provided by SAP.

User Name – Administrator          Password – manage

3. After login following screen will be displayed. Choose Installation Type as “Master(Primary Installation)” and click on Apply

Cloud Connector Initial Configuration Step-1

4. In the next screen you will be asked to change the password. Provide the new password and click on Save.

Cloud Connector Initial Configuration Step-2

5. The following screen will be displayed, in this screen we need provide our SAP HANA Cloud Platform Trail/Productive details to securely connect our local cloud connector to our cloud system. Please enter the following details and click on Apply

Landscape Host  Choose the value from drop down. “hanatrail.ondemand.com” for  trail Instance. “hana.ondemand.com for productive instance
Account Name  Enter your HCP trial account id. “p1941955950trial”
Display Name  Choose any name of you choice. “Akash”
Account User  Enter your HCP trail id. “p1941955950″
Password  Enter your HCP trial password. (can not share :) )

Cloud Connector Initial Configuration Step-56. After entering above details now cloud connector will try to establish a secure tunnel to your cloud trial instance. After successful connection established you should the screen below.

Cloud Connector Initial Configuration Step-6

Congrats you have successfully finished the setup of initial configuration of SAP Cloud Connector 2.0. In our next blog you will learn how to connect your on-premise gateway system to cloud trial instance and start development in SAP WebIDE.

Please stay tuned to us for more  SAPUI5 and SAP Fiori tutorials and SAP HANA Cloud tutorials.Please feel free to comment and let us know your feedback. You feedback will keep us alive.

like-128

The post How to setup Initial Configuration in SAP Cloud Connector 2.0 appeared first on SAP Fiori,SAP HANA,SAPUI5,SAP Netweaver Gateway Tutorials,Interview Questions|SAP Learners.

How to create SAP HANA SQL Synonym

$
0
0

Hello everyone in this blog you will learn to create SAP HANA SQL synonym in SAP HANA. Lets get started.

What is SAP HANA SQL Synonym

SAP HANA SQL Synonym is an alternative name created for a table, view, procedure and sequence in SAP HANA. There are two types of synonyms

  • Private Synonym
  • Public Synonym

Prerequisites

You should have a table (or) view (or) procedure (or) sequence created in a schema

Syntax

Synonym can be created by using following SAP HANA SQL syntax

CREATE [PUBLIC] SYNONYM <synonym_name> FOR <table_name> or
<view_name> or
<procedure_name> or
<sequence_name>

Step-by-Step Procedure

1. Login to SAP HANA Studio.

2. Identify the table for which you want to create a Synonym. In this example i am going to create a synonym for the table “ARTCILE_INFO” which is in the schema “SAPLEARNERS”.

SAP HANA SQL Synonym Step_1

3. Right click on the table and choose New Synonym.

SAP HANA SQL Synonym Step_2

4. Provide the synonym name and click on Execute. Select Public checkbox to create a public synonym (or) leave it blank to create a private synonym. In this example i am creating a private synonym “SY_ARTICLES”.

SAP HANA SQL Synonym Step_3

5. After executing, a new private synonym will created successfully in the Synonym folder in the schema.

SAP HANA SQL Synonym Step_4

6. If you have selected the check box Public while creating the synonym in Step-4, a public synonym will be created in Public Synonym folder.

SAP HANA SQL Synonym Step_57. Now you can directly the query on the table with synonym name as below

SELECT * FROM P_SY_ARTICLES

Congrats! You have successfully created Synonym in SAP HANA. Please stay tuned for SAP HANA tutorials. Leave a comment in the below comment section and let us know your feedback.

like-128

The post How to create SAP HANA SQL Synonym appeared first on SAP Fiori,SAP HANA,SAPUI5,SAP Netweaver Gateway Tutorials,Interview Questions|SAP Learners.

How to setup KPI Modeler Framework in SAP Fiori

$
0
0

Hello everyone in this blog you will learn how to setup KPI Modeler Framework in SAP Fiori Launchpad. KPI Modeler was renamed to SAP Smart Business Modeler. Lets get started.

What is KPI Modeler?

Step-by-Step Configuration

1. Logon to Front-End/Gateway server.

2. Go to SU01 – User Maintenance transaction.Enter the User Id and click on change.

SU01 - User Maintenance

3. Navigate to Role tab. Add below mentioned role and click on save.

  • /UI2/SAP_KPIMOD_TCR_S – SAP Role for KPI Modeler

KPI Modeler Framework - Assign Launchpad Role4. Login to HANA Studio. Expand Security folder and choose the user to add KPI Modeler Framework HANA roles.

KPI Modeler Framework - HANA User

5. Navigate to Grant Roles tab. Click on ‘+’ sign to add below HANA roles.

  • sap.hba.r.sb.core.roles::SAP_SMART_BUSINESS_RUNTIME – Read-access to KPI definitions
  • sap.hba.r.sb.core.roles::SAP_SMART_BUSINESS_MODELER – KPI modeling

KPI Modeler Framework - Assign HANA Role6. We have assigned all necessary roles to the user in both Front-End and HANA server. Now run the SAP Fiori Launchpad to see the KPI Modeler Framework related tiles.

KPI Modeler Framework

Congrats! You have successfully setup the KPI Modeler Framework. Please stay tuned for SAP Fiori tutorials. Leave a comment in the below comment section and let us know your feedback.

The post How to setup KPI Modeler Framework in SAP Fiori appeared first on SAP Fiori,SAP HANA,SAPUI5,SAP Netweaver Gateway Tutorials,Interview Questions|SAP Learners.

What are External Views in ABAP for HANA

$
0
0

Hello everyone, in this blog you will learn about External Views in ABAP for HANA.

What are External Views

External View is Data Dictionary view in ABAP to consume the HANA models modeled in SAP HANA repository. External views are created using the creation wizard in Eclipse IDT tools using ABAP perspective.

External views can be created against these SAP HANA repository models

  1. Attribute View
  2. Analytical View
  3. Calculation Views(only with default values to Input parameters)

When you create a external view the definition of HANA view is copied from HANA repository to ABAP. We can create several external views for one and the same HANA model.

Synchronizing External View with the HANA repository

Synchronizing of external view with the HANA repository is required when there are any changes done on the HANA model after creation of external view. The external view editor contains a button called “Synchronize” to synchronize the external view with HANA view.

Synchronize External Views

Supported HANA Data Types with ABAP Data Types

When you are creating external view to the HANA model only below mapping data types are supported.

HANA Data Type ABAP Data Dictionary Type Length
SMALLINT INT2 2-byte integer
INTEGER INT4 4-byte integer
DECIMAL DEC Packed number
SMALLDECIMAL DEC Packed number
FLOAT FLTP Binary floating point number
NVARCHAR CHAR Unicode character string
VARBINARY RAW Byte string
BLOB RAWSTRING Byte string
NCLOB STRING Unicode character string


Examples

Create external view for Attribute View

Congrats! You have successfully learned about External Views in ABAP for HANA. Please stay tuned for SAP ABAP for HANA tutorials. Leave a comment in the below comment section and let us know your feedback.

like-128

The post What are External Views in ABAP for HANA appeared first on SAP Fiori,SAP HANA,SAPUI5,SAP Netweaver Gateway Tutorials,Interview Questions|SAP Learners.


How to change background image for SAP Fiori Launchpad Logon Page

$
0
0

Hello everyone, in this blog you will learn how to change the background image for SAP Fiori Launchpad logon page. SAP Fiori Launchpad comes with a standard background image, in this blog we are going to change the image to a new image as per your client requirement. Lets get started.

Step-by-Step Procedure

1. When you logon to the SAP Fiori Launchpad, you will see standard background image for SAP Fiori Launchpad login page.

2. Go to transaction code SE80. Choose MIME Repository.

3. Navigate to SAP → PUBLIC → BC → UI2 → logon → img. Expand “img” folder you will find different background jpg images.

4. Choose login_background.jpg , right-click and choose Upload/Download → Upload and Replace

SAP Fiori Launchpad Image 
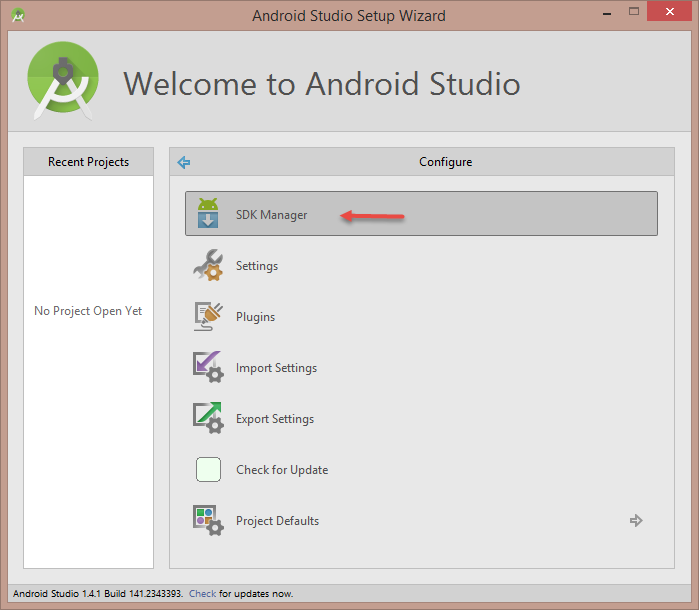
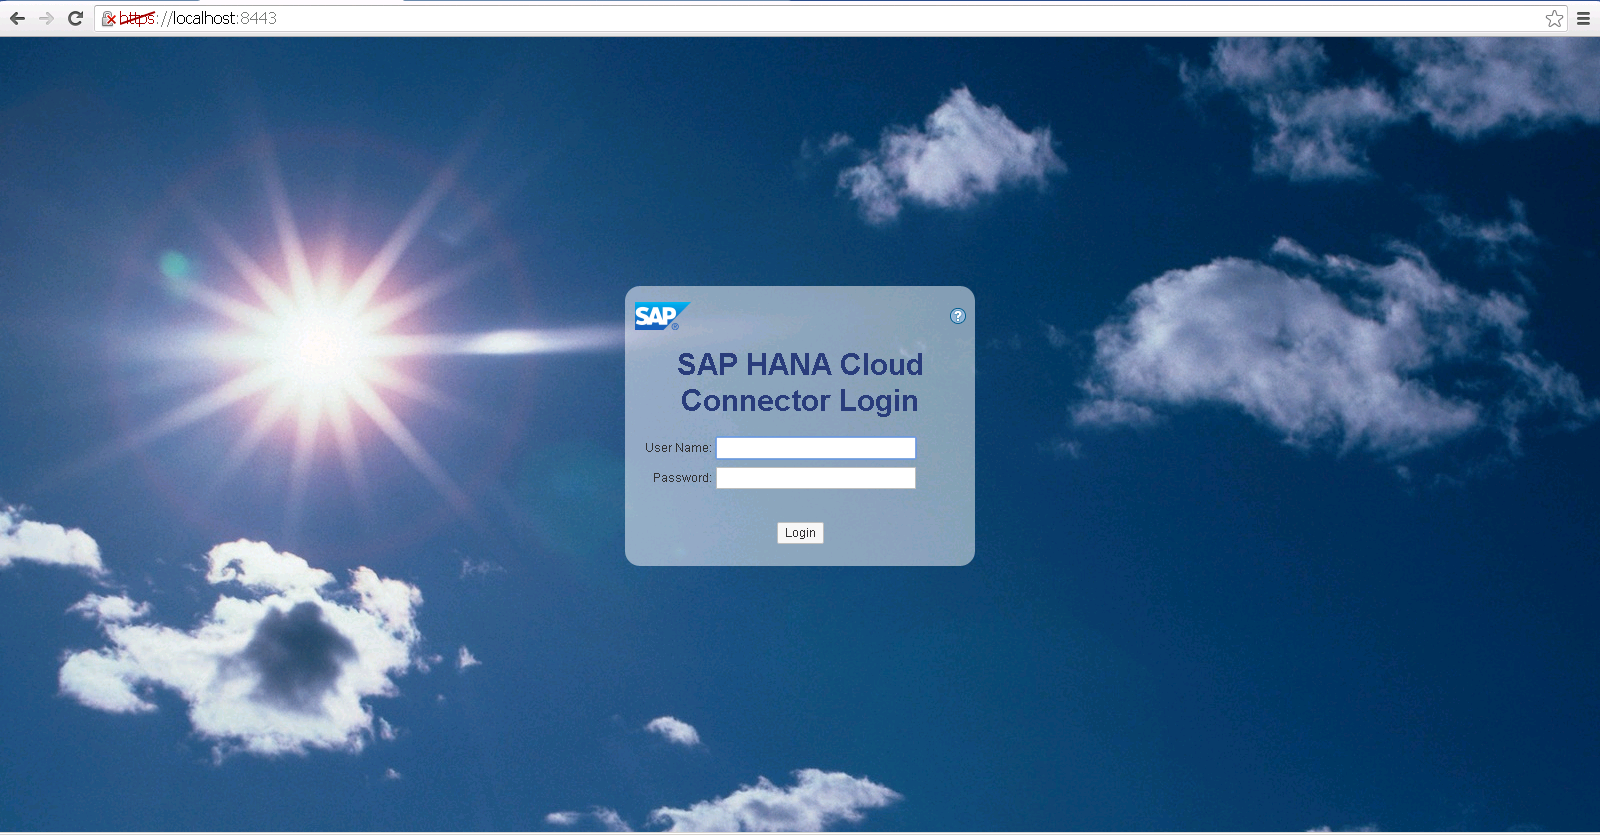
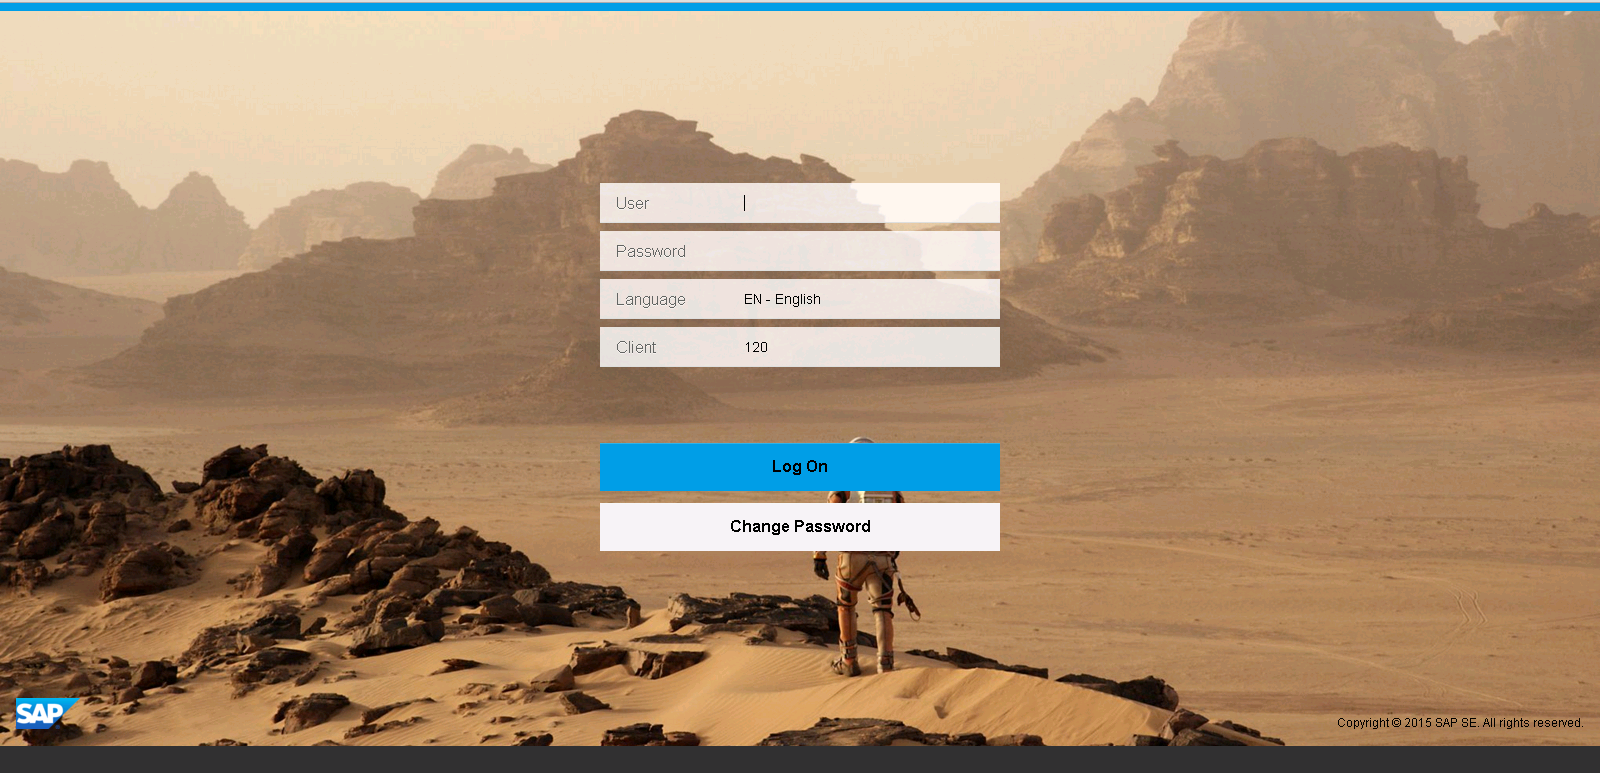
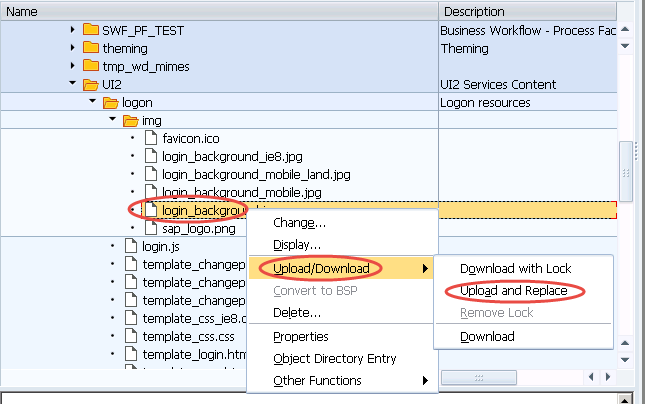
5. In the File explorer choose the new image. The name of your new image should be the same “login_background.jpg”. Save the changes in the transport request.

6. Now logon again into SAP Fiori Launchpad by accessing the launchpad url, you should see your new image as background.

SAP Fiori Launchpad Logon Image


Congrats! You have successfully changed the background image for SAP Fiori Launchpad Logon. Please stay tuned for SAP Fiori tutorials. Leave a comment in the below comment section and let us know your feedback.

The post How to change background image for SAP Fiori Launchpad Logon Page appeared first on SAP Fiori,SAP HANA,SAPUI5,SAP Netweaver Gateway Tutorials,Interview Questions|SAP Learners.

Whats New in SAP Netweaver ABAP 7.40

$
0
0

Hello everyone,

In this blog you will learn about Whats New in SAP Netweaver ABAP 7.4. There are many new features introduced in SAP Netweaver 7.4 and the ABAP stack is optimized for SAP HANA. SAP Netweaver 7.4 is minimum requirement to move to SAP Business Suite on HANA. With these new features introduced from SAP Netweaver 7.4 SAP HANA database in-memory computing can be leveraged at ABAP level. So, let look at these features, learn it and implement them.

Are you working on SAP Netweaver 7.40 ?

To answer this question, log on to your SAP system. In the menu bar navigate to System → Status. In the popup window, under SAP system data section click on display button under “Product Version” field. You can see list of installed software component versions like below

SAP Netweaver 7.40

From list of installed software components, look for the Release version of SAP_BASIS and SAP_ABA components to check the SAP Netweaver version.

Below are list of main features among different sections

#Expressions, Functions, Operand Positions

1. Inline Declarations
Now you can declare the variables and field-symbols at the same position where you are using them. Inline declarations are possible only for DATA and FIELD-SYMBOL.
Old Syntax
TYPES: BEGIN OF ty_mara,
         matnr TYPE matnr,
         ersda TYPE ersda,
         ernam TYPE ernam,
         laeda TYPE laeda,
         aenam TYPE aenam,
       END OF ty_mara.

DATA: lt_mara TYPE STANDARD TABLE OF ty_mara,
      lv_name TYPE string.

FIELD-SYMBOLS: <fs_mara> TYPE ty_mara.

SELECT matnr ersda ernam laeda aenam
       FROM mara
       INTO TABLE lt_mara UP TO 10 ROWS.

lv_name = 'Old declaration NW < 7.40'.

LOOP AT lt_mara ASSIGNING <fs_mara>.
  WRITE: <fs_mara>-matnr,<fs_mara>-ernam.
ENDLOOP.
New Syntax
TYPES: BEGIN OF ty_mara,
         matnr TYPE matnr,
         ersda TYPE ersda,
         ernam TYPE ernam,
         laeda TYPE laeda,
         aenam TYPE aenam,
       END OF ty_mara.

DATA: lt_mara TYPE STANDARD TABLE OF ty_mara.      

SELECT matnr ersda ernam laeda aenam
       FROM mara
       INTO TABLE lt_mara UP TO 10 ROWS.

DATA(lv_name) = 'New declaration NW >= 7.40'. "Inline declaration

LOOP AT lt_mara ASSIGNING FIELD-SYMBOL(<fs_mara>).  "Inline declaration
  WRITE: <fs_mara>-matnr,<fs_mara>-ernam.
ENDLOOP.
2. Constructor Expressions
A new type of expression called constructor Expressions are introduced to construct results of specified types and their contents. Below are the list of constructor expressions
  • NEW creates object
  • VALUE creates values
  • REF get references
  • EXACT perform a lossless assignment or calculation
  • CONV convert values
  • CAST performs an up cast or down cast
  • COND and SWITCH enable conditional expression
 Syntax: VALUE Operator                                                               
Old Syntax
TYPES: BEGIN OF ty_old,
         f1 TYPE c,
         f2 TYPE c,
         f3 TYPE c,
       END OF ty_old.

DATA: ls_old  TYPE ty_old.

ls_old-f1 = 'A'.
ls_old-f2 = 'B'.
ls_old-f3 = 'C'.

WRITE: ls_old-f1,ls_old-f2,ls_old-f3.
 New Syntax
TYPES: BEGIN OF ty_new,
         f1 TYPE c,
         f2 TYPE c,
         f3 TYPE c,
       END OF ty_new.

* creating intial values using constructor expression - VALUE
DATA(ls_new) = VALUE ty_new( f1 = 'A'
                             f2 = 'B'
                             f3 = 'C').

WRITE: ls_new-f1,ls_new-f2,ls_new-f3.

* changing the initial values using '#' 
ls_new = VALUE #( f1 = 'X'
                  f2 = 'Y'
                  f3 = 'Z').

WRITE: ls_new-f1,ls_new-f2,ls_new-f3.


The post Whats New in SAP Netweaver ABAP 7.40 appeared first on SAP Fiori,SAP HANA,SAPUI5,SAP Netweaver Gateway Tutorials,Interview Questions|SAP Learners.

Internal Table Expressions in NetWeaver 7.4 Release

$
0
0

Hello everyone,

In this blog you will learn how to use Internal Table Expressions in Netweaver 7.4 Release. This is second part in series of blog about What’s New in Netweaver 7.4 Release. Please read our first blog on Inline Declarations of DATA and FIELD-SYMBOL. Lets get started.

Expressions and Functions of Internal Tables

A table expression consists of internal table name, directly followed by square brackets [ ]

READ TABLE

Before Netweaver 7.4 we use READ TABLE syntax to read the internal table, but with new release of Netweaver 7.4 SAP has introduced table expressions to read the internal table with brand new syntax.

We can read the internal table data with three possible ways.You will learn how to use table expressions to read the internal table which is different from old syntax READ TABLE … .

1. Index read – We can read the internal table data using the table index

Old Syntax
READ TABLE IT_MARA INTO DATA(WA_MARA) INDEX 1.
New Syntax
DATA(WA_MARA) = IT_MARA[ 1 ].
 

2. Read using a free key - We can read the internal table using the free key.

Old Syntax
READ TABLE IT_BOOKINGS INTO WA_BOOKINGS WITH KEY CARRID = 'AA'
                                                 CONNID = '17'
                                                 CUSTTYPE = 'P'.
New Syntax
DATA(WA_BOOKINGS) = IT_BOOKINGS[ CARRID   = 'AA'
                                 CONNID   = '17'
                                 CUSTTYPE = 'P' ].
 

3. Read using a table key – We can read the internal table by specifying the table keys

Old Syntax
READ TABLE IT_BOOKINGS INTO WA_BOOKINGS WITH TABLE KEY CARRID = 'AA'
                                                       CONNID = '17'.
 New Syntax
DATA(WA_BOOKINGS) = IT_BOOKINGS[ KEY keyid COMPONENTS CARRID = 'AA'
                                                      CONNID = '17' ].
 

APPEND

Before Netweaver 7.4 we use APPEND syntax to append rows to the internal table, but with new release of Netweaver 7.4 SAP has introduced table expressions to initialize the internal table with brand new syntax.

Old Syntax
TYPES: BEGIN OF ty_old,
         f1 TYPE c,
       END OF ty_old.

DATA: wa_old  TYPE ty_old,
      it_old  TYPE STANDARD TABLE OF ty_old WITH EMPTY KEY.

wa_old-f1 = 'A'.
APPEND wa_old TO it_old.

wa_old-f1 = 'B'.
APPEND wa_old TO it_old.

wa_old-f1 = 'C'.
APPEND wa_old TO it_old.
 New Syntax
TYPES: BEGIN OF ty_new,
         f1 TYPE c,
       END OF ty_new,
       tty_new TYPE TABLE OF ty_new WITH EMPTY KEY.

DATA(it_new) = VALUE tty_new( ( f1 = 'A') 
                              ( f1 = 'B') ).
 

MODIFY

We use MODIFY statement to modify the contents in internal table. In ABAP Netweaver 7.4 release SAP has introduced brand new syntax using table expressions. We also use FIELD-SYMBOL to modify the contents in internal table. We will look at both versions and you will also learn the new ABAP 7.4 new syntax

Old Syntax
* Modify the contents based on INDEX
READ TABLE IT_BOOKINGS ASSIGNING <FS_BOOKINGS> INDEX 1.
IF sy-subrc = 0.
  <FS_BOOKINGS>-CARRID = 'NP'.  
ENDIF.

* Modify the contents based on FREE-KEY
READ TABLE IT_BOOKINGS ASSIGNING <FS_BOOKINGS> WITH KEY CARRID = 'AA'
                                                        CONNID = '17'.
IF sy-subrc = 0.
  <FS_BOOKINGS>-CARRID = 'NP'.  
ENDIF.

* Modify the contents based on TABLE-KEY
READ TABLE IT_BOOKINGS ASSIGNING <FS_BOOKINGS> WITH TABLE KEY CARRID = 'AA'
                                                              CONNID = '17'.
IF sy-subrc = 0.
  <FS_BOOKINGS>-CARRID = 'NP'.  
ENDIF.
 New Syntax
*** Using Table Expressions **
* Modify the contents based on INDEX
TRY.
    it_bookings[ 1 ]-carrid = 'NP'.
  CATCH cx_sy_itab_line_not_found.
ENDTRY.


* Modify the contents based on FREE-KEY
TRY.
    it_bookings[ carrid = 'AA' connid = '17' ]-carrid = 'NP'.
  CATCH cx_sy_itab_line_not_found.
ENDTRY.


* Modify the contents based on TABLE-KEY
TRY.
    it_bookings[ KEY keyid COMPONENTS carrid = 'AA'
                                    connid = '17' ]-carrid = 'NP'.
  CATCH cx_sy_itab_line_not_found.
ENDTRY.
 

New Predicate Function – LINE_EXISTS( )

In ABAP 7.4, we have new syntax to check if the record exists in the internal table based on some conditions. This syntax is short form to READ TABLE with TRANSPORTING NO FIELDS followed by sy-subrc check. LINE_EXISTS function will return “true” if the row exists and “false” if the row does not exists.

Old Syntax
READ TABLE it_bookings TRANSPORTING NO FIELDS WITH KEY carrid = 'AA'
                                                       connid = '17'.
IF sy-subrc = 0.

  .....
ENDIF.
New Syntax
IF line_exists( it_bookings[ carrid = 'AA'
                             connid = '17'] ).
  .....
ENDIF.
 

New Table Function – LINE_INDEX( )

In ABAP 7.4 release, we have new syntax LINE_INDEX() to identify the index of a row when a condition is met while reading the internal table. The new syntax is similar to READ TABLE with TRANSPORTING NO FIELDS followed by sy-subrc check. if sy-subrc = 0, then sy-tabix will give the index of the row.

Old Syntax
READ TABLE it_bookings TRANSPORTING NO FIELDS WITH KEY carrid = 'AA'
                                                       connid = '17'.
IF sy-subrc = 0.
  WRITE: sy-tabix. "index
ENDIF.
 New Syntax
DATA(indx) = line_index( it_bookings[ carrid = 'AA'
                                      connid = '17'] ).
WRITE: indx.
 

Congrats! You have successfully learned new features in ABAP 7.4 release. Next time when you write code try using the new syntax and let us know your experience. Please stay tuned for ABAP for HANA/ABAP 7.4 tutorials. Leave a comment in the below comment section and let us know your feedback.

The post Internal Table Expressions in NetWeaver 7.4 Release appeared first on SAP Fiori,SAP HANA,SAPUI5,SAP Netweaver Gateway Tutorials,Interview Questions|SAP Learners.

How to create ABAP CDS Views with Parameters

$
0
0

Hello everyone,

In this ABAP for HANA tutorial, you will learn How to create ABAP CDS Views with parameters in ABAP for HANA. Input parameters are used to restrict the data from CDS Views. Please click here to access all tutorials related to ABAP CDS Views. Lets get started.

Prerequisites

  • You have access to minimum ABAP Netweaver 7.4 system.
  • You have installed Eclipse IDE( Kepler/Juno version ) on your local machine.Click here to know more about.
  • You have installed ABAP Development Tools in Eclipse IDE.
  • You have created ABAP Project in eclipse to connect to ABAP Netweaver 7.4 system.Click here to know how to create ABAP Project.
  • You have basic understanding of ABAP CDS Views.

Step-by-Step Procedure

1. Choose the package in which you want to create ABAP CDS Views. Right-click on the package → New → Other ABAP Repository Object.New ABAP Repository Object

2. In the New ABAP Repository Object window, search for DDL source object by typing in search field.Select the DDL Source and hit Next.

Search for DDL Source

3. In the New DDL Source window, enter Name and Description of the CDS View and hit Finish.

4. A new ABAP CDS view editor opens up like below and paste the below code.

@AbapCatalog.sqlViewName: 'Z_CDS_PARAMS'
@AbapCatalog.compiler.compareFilter: true
@AccessControl.authorizationCheck: #CHECK
@EndUserText.label: 'CDS View with Parameters'

define view Z_Cds_With_Params 
       with parameters p_billing_status  :SNWD_SO_CF_STATUS_CODE, 
                       p_delivery_status :SNWD_SO_OR_STATUS_CODE                
       as select from snwd_so 
       join snwd_so_i on snwd_so.node_key = snwd_so_i.parent_key{
            snwd_so.so_id             as orderno,
            snwd_so_i.so_item_pos     as itemno, 
            snwd_so_i.currency_code   as currency,
            snwd_so_i.gross_amount    as grossamount,
            snwd_so_i.net_amount      as netamount,
            snwd_so_i.tax_amount      as taxamount
                         
        } where snwd_so.billing_status  = :p_billing_status and
                snwd_so.delivery_status = $parameters.p_delivery_status;

5.


The post How to create ABAP CDS Views with Parameters appeared first on SAP Fiori,SAP HANA,SAPUI5,SAP Netweaver Gateway Tutorials,Interview Questions|SAP Learners.

Aggregate Expressions in ABAP CDS Views

$
0
0

Hello everyone,

In this ABAP CDS Views tutorials you will learn how to use Aggregate Expressions in ABAP CDS Views. To access all ABAP CDS Views tutorials click here. Lets get started.

Prerequisites

  • You have installed Eclipse IDE( Mars Version )on your local machine.Click here to know more about.
  • You have installed ABAP Development Tools in Eclipse IDE.
  • You have access to minimum ABAP Netweaver 7.4 on HANA.
  • You have created ABAP Project in eclipse to connect to ABAP Netweaver 7.4 system.Click here to know how to create ABAP Project.

Below is the list of aggregation expressions used in ABAP CDS views.

SUM

@AbapCatalog.sqlViewName: 'ZCDS_AGGR'
@AbapCatalog.compiler.compareFilter: true
@AccessControl.authorizationCheck: #CHECK
@EndUserText.label: 'Aggregations'

define view Z_Cds_Agg_sum as select from snwd_stock 
    join snwd_pd on snwd_stock.product_guid = snwd_pd.node_key
    {    
    key snwd_pd.product_id,
    snwd_pd.category,    
    // Aggregate function "SUM"
    sum(snwd_stock.quantity) as total_stock    
    } 
    group by snwd_pd.category,
             snwd_pd.product_id
In the above example ABAP CDS view selects the total stock of the product by using the aggregate function SUM and GROUP BY product and category.

MAX

@AbapCatalog.sqlViewName: 'ZCDS_AGGR'
@AbapCatalog.compiler.compareFilter: true
@AccessControl.authorizationCheck: #CHECK
@EndUserText.label: 'Aggregations'
define view Z_Cds_Agg_max as select from snwd_so
          join snwd_bpa on snwd_so.buyer_guid = snwd_bpa.node_key
          {
           key  snwd_bpa.bp_id,
                snwd_bpa.company_name,
           // Aggregate function "MAX"
           max(snwd_so.gross_amount) as max_sales_amt
} group by snwd_bpa.bp_id,
           snwd_bpa.company_name
In the above example ABAP CDS view selects the maximum sales amount generated by the customer by using the aggregate function MAX and GROUP BY business partner.

MIN

@AbapCatalog.sqlViewName: 'ZCDS_AGGR'
@AbapCatalog.compiler.compareFilter: true
@AccessControl.authorizationCheck: #CHECK
@EndUserText.label: 'Aggregations'
define view Z_Cds_Agg_min as select from snwd_so
          join snwd_bpa on snwd_so.buyer_guid = snwd_bpa.node_key
          {
           key  snwd_bpa.bp_id,
                snwd_bpa.company_name,
           // Aggregate function "MIN"
           min(snwd_so.gross_amount) as min_sales_amt
} group by snwd_bpa.bp_id,
           snwd_bpa.company_name
In the above example ABAP CDS view selects the minimum sales amount generated by the customer by using the aggregate function MIN and GROUP BY business partner.

COUNT( * )

@AbapCatalog.sqlViewName: 'ZCDS_AGGR2'
@AbapCatalog.compiler.compareFilter: true
@AccessControl.authorizationCheck: #CHECK
@EndUserText.label: 'Aggregations'
define view Z_Cds_Agg as select from snwd_so
          join snwd_bpa on snwd_so.buyer_guid = snwd_bpa.node_key
          {
           key  snwd_bpa.bp_id,
                snwd_bpa.company_name,
           // Aggregate expression COUNT( * )
           count(*) as min_sales_amt
} group by snwd_bpa.bp_id,
           snwd_bpa.company_name
In the above example ABAP CDS view selects the total number of sales order created against the business partner by using the aggregate function COUNT( * ) and GROUP BY business partner.

COUNT( DISTINCT )

@AbapCatalog.sqlViewName: 'ZCDS_AGGR_4'
@AbapCatalog.compiler.compareFilter: true
@AccessControl.authorizationCheck: #CHECK
@EndUserText.label: 'Aggregate Expressions'
define view Zcds_Agg_C as select from snwd_so_i         
       join snwd_pd on snwd_so_i.product_guid = snwd_pd.node_key        
     {
        key snwd_pd.product_id,                    
        // Aggregate Expression - COUNT( DISTINCT )
        count( distinct snwd_so_i.node_key) as orders_count                
} group by snwd_pd.product_id
In the above example ABAP CDS view selects the total number of sales order created against the product by using the aggregate function COUNT( DISTINCT ) and GROUP BY product id.

Points to be remembered

  1. Every aggregate expressions used need an alternative element name defined using AS.
  2. Aggregate expressions should require GROUP BY clause.
  3. All non-aggregated fields used in CDS view should be specified in the GROUP BY clause.

Congrats! You have successfully learned different Aggregate Expressions in ABAP CDS Views. Please stay tuned for ABAP CDS View tutorials. Leave a comment in the below comment section and let us know your feedback.

The post Aggregate Expressions in ABAP CDS Views appeared first on SAP Fiori,SAP HANA,SAPUI5,SAP Netweaver Gateway Tutorials,Interview Questions|SAP Learners.

How to use String Functions in ABAP CDS Views

$
0
0

Hello everyone,

In this ABAP CDS View tutorial, you will learn how to use String Functions in ABAP CDS Views.To access all ABAP CDS Views tutorials click here. Lets get started.

Prerequisites

  • You have installed Eclipse IDE( Mars Version )on your local machine.Click here to know more about.
  • You have installed ABAP Development Tools in Eclipse IDE.
  • You have access to minimum ABAP Netweaver 7.4 on HANA.
  • You have created ABAP Project in eclipse to connect to ABAP Netweaver 7.4 system.Click hereto know how to create ABAP Project.

Below is the list of String Functions in ABAP CDS Views

CONCAT(arg1, arg2)

CONCAT(arg1, agr2) string function can be used to concatenate two character strings.

@AbapCatalog.sqlViewName: 'ZCDS_STR_FUN'
@AbapCatalog.compiler.compareFilter: true
@AccessControl.authorizationCheck: #CHECK
@EndUserText.label: 'String Functions'
define view Zcds_Sql_Func as select from kna1 {

    // CONCATENATE name1 & name2 
    CONCAT( kna1.name1, kna1.name2 ) as full_name
}

CONCAT_WITH_SPACE(arg1, arg2, spaces)

This string function is used to concatenate two character strings with space. The number of blanks between the arguments arg1 and arg2 is specified in spaces.

@AbapCatalog.sqlViewName: 'ZCDS_STR_FUN'
@AbapCatalog.compiler.compareFilter: true
@AccessControl.authorizationCheck: #CHECK
@EndUserText.label: 'String Functions'
define view Zcds_Sql_Func as select from kna1 {

    // CONCATENATE name1 & name2 with 4 space
    CONCAT_WITH_SPACE( kna1.name1, kna1.name2, 4 ) as full_name
}

SUBSTRING(arg, pos, len)


The post How to use String Functions in ABAP CDS Views appeared first on SAP Fiori,SAP HANA,SAPUI5,SAP Netweaver Gateway Tutorials,Interview Questions|SAP Learners.

Date Functions in ABAP CDS Views

$
0
0

Hello everyone,

In this ABAP CDS View tutorial, you will learn how to use Date Functions in ABAP CDS view.

Prerequisites

  • You have installed Eclipse IDE( Mars version )on your local machine.Click here to know more about.
  • You have installed ABAP Development Tools in Eclipse IDE.
  • You have access to minimum ABAP Netweaver 7.5 on HANA.
  • You have created ABAP Project in eclipse to connect to ABAP Netweaver 7.4 system.Click here to know how to create ABAP Project.

Please be note that Date and Time Functions are introduced in SAP NW ABAP 7.5

Below are the list of Date and Time Functions in ABAP CDS views.

DATE_IS_VALID(date)

The date function DATE_IS_VALID is used to validate the date contains the valid SAP date format “YYYYMMDD“. It returns “1” if the date is in valid date format else “0“. If the date is blank it returns “0“.

@AbapCatalog.sqlViewName: 'ZCDS_DATE'
@AbapCatalog.compiler.compareFilter: true
@AccessControl.authorizationCheck: #CHECK
@EndUserText.label: 'Date Functions'
define view zcds_date_functions
            with parameters p_from_date:abap.dats
            as select from snwd_so
 {
  snwd_so.buyer_guid,
  snwd_so.billing_status,
  
  // returns 1 - Valid Date
  // returns 0 - Invalid Date
  DATS_IS_VALID(:p_from_date) as from_date
}

DATS_DAYS_BETWEEN(date1, date2)

The date function DATS_DAYS_BETWEEN calculates the no of days between the two specified dates, date1 and date2.

@AbapCatalog.sqlViewName: 'ZCDS_DATE'
@AbapCatalog.compiler.compareFilter: true
@AccessControl.authorizationCheck: #CHECK
@EndUserText.label: 'Date Functions'
define view zcds_date_functions
            as select from vbak
 {
  vbak.vbeln,  //Sales Document
  vbak.auart,  //Sales Document Type
  vbak.audat,  //Document Date
  vbak.vdatu,  //Requested delivery date
  
  DATS_DAYS_BETWEEN(audat, vdatu) as no_of_days
}

DATS_ADD_DAYS(date, days, on_error)

The date DATS_ADD_DAYS adds days to the specified date date. days should be of type INT4, both negative and positive value for days is allowed.

@AbapCatalog.sqlViewName: 'ZCDS_DATE'
@AbapCatalog.compiler.compareFilter: true
@AccessControl.authorizationCheck: #CHECK
@EndUserText.label: 'Date Functions'
define view zcds_date_functions
            as select from vbak
 {
  vbak.vbeln,  //Sales Document
  vbak.auart,  //Sales Document Type
  vbak.audat,  //Document Date
  vbak.vdatu,  //Requested delivery date
  
  DATS_ADD_DAYS(vdatu, 10, 'NULL')     as option2,  //add 10 days
  DATS_ADD_DAYS(vdatu, -10, 'NULL')    as option1,  //substract 10 days
  DATS_ADD_DAYS(vdatu, 5, 'FAIL')      as option3,
  DATS_ADD_DAYS(vdatu, 4, 'INITIAL')   as option4,
  DATS_ADD_DAYS(vdatu, 2, 'UNCHANGED') as option5
}

DATS_ADD_MONTHS(date, months, on_error)

The date function DATS_ADD_MONTHS add months months to the specified date date.

@AbapCatalog.sqlViewName: 'ZCDS_DATE'
@AbapCatalog.compiler.compareFilter: true
@AccessControl.authorizationCheck: #CHECK
@EndUserText.label: 'Date Functions'
define view zcds_date_functions 
            as select from vbak
 {
  vbak.vbeln,  //Sales Document
  vbak.auart,  //Sales Document Type
  vbak.audat,  //Document Date
  vbak.vdatu,  //Requested delivery date
  
  DATS_ADD_MONTHS(vdatu, 10, 'NULL')     as option1,  //add 10 months
  DATS_ADD_MONTHS(vdatu, -10, 'NULL')    as option2,  //substract 10 months 
  DATS_ADD_MONTHS(vdatu, 5, 'FAIL')      as option3, 
  DATS_ADD_MONTHS(vdatu, 4, 'INITIAL')   as option4,
  DATS_ADD_MONTHS(vdatu, 2, 'UNCHANGED') as option5
}


Congrats! You have successfully learned how to use Date Functions in ABAP CDS Views. Please stay tuned for ABAP CDS Views tutorials. Leave a comment in the below comment section and let us know your feedback.

The post Date Functions in ABAP CDS Views appeared first on SAP Fiori,SAP HANA,SAPUI5,SAP Netweaver Gateway Tutorials,Interview Questions|SAP Learners.


Types of KPI tiles using KPI Modeler in SAP Fiori

$
0
0

Hello everyone, you will learn what are the different types of tiles you can create using KPI Modeler Framework. Learn how to setup KPI Modeler to create KPI tiles on SAP Fiori Launchpad. These tiles will be created directly on SAP Fiori Launchpad using the KPI Modeler.

Below is the list of tiles that can be created

Numeric Tile

KPI Modeler - Numeric Tile
KPI Modeler – Numeric Tile

Below is the list of Tile Configuration and Navigation properties that you can set for the Numeric Tile.

kpi_numeric_tile_config

Comparison Tile

kpi_comparison_tile

Below is the list of Tile Configuration and Navigation properties that you can set for the Comparison Tile.

kpi_comparison_tile_config

Trend Tile

kpi_trend_tile

Below is the list of Tile Configuration and Navigation properties that you can set for the Trend Tile.

kpi_trend_tile_config

Actual vs. Target Tile

kpi_actual_target_tile

Below is the list of Tile Configuration and Navigation properties that you can set for the Actual vs. Target Tile.

kpi_actual_target_tile_config

Comparison Tile Multiple Measures

kpi_multiple_measure_tile

Below is the list of Tile Configuration and Navigation properties that you can set for the Comparison Tile Multiple Measures Tile.

kpi_multiple_measure_tile_config

Dual Tile

kpi_dual_tile

Below is the list of Tile Configuration and Navigation properties that you can set for Dual Tile.

kpi_dual_tile_config

Congrats! You have successfully learned different tiles in KPI Modeler. Please stay tuned for more SAP Fiori tutorials. Leave a comment in the below comment section and let us know your feedback.


The post Types of KPI tiles using KPI Modeler in SAP Fiori appeared first on SAP Fiori,SAP HANA,SAPUI5,SAP Netweaver Gateway Tutorials,Interview Questions|SAP Learners.

How to set Sort Order in ABAP ALV with IDA on HANA

$
0
0

Hello everyone, In our previous tutorials we introduced you to the new flavor of ABAP ALV called ALV with Integrated Data Access(IDA). In this tutorial you will learn how to set the default sorting to the ALV with IDA on HANA. Lets get started. Below is the method which we can use to display the sorted ALV with IDA on HANA.

SET_SORT_ORDER( ) in interface IF_SALV_GUI_LAYOUT_IDA

To set the sorting order to ALV with IDA

  1. Get the reference object of Layout by calling the method DEFAULT_LAYOUT( ) in interface IF_SALV_GUI_TABLE_IDA.
  2. Define the sorting rule by adding the column name, sorting order
  3. Set the sorting rule to the ALV to the layout by calling the method SET_SORT_ORDER().

Step-by-Step Procedure

Create an ABAP Program in Eclipse.Enter Name, Description and click on Next.

New ABAP Program

2. In the Selection of Transport Request window, choose the transport request. As we are saving the program in $TMP package in our case no transport request is required.Click on Finish.

Selection of Transport Request

3. Copy and paste the below code.

********************************************************
*                www.saplearners.com                   *
*            Sorting in ABAP ALV with IDA              *
********************************************************
START-OF-SELECTION.
*1. Create object reference for ALV with IDA
DATA(lo_alv_display) = cl_salv_gui_table_ida=>create( 
                                              iv_table_name = 'SNWD_PD' ).

*2. Get ALV Layout reference
  DATA(lo_layout) = lo_alv_display->default_layout( ).

*3. Define Sorting rule
DATA(lt_sort_rule) = VALUE if_salv_gui_types_ida=>yt_sort_rule(
                           ( field_name = 'CATEGORY' 
                             descending = abap_false )).

*4. Set Sorting rule to the ALV
lo_layout->set_sort_order( it_sort_order = lt_sort_rule ).

*5. Display ALV
  lo_alv_display->fullscreen( )->display( ).

4. Activate and Execute the ABAP program.

5. Below is the output before applying sorting rule on the column “Category”.

alv_with_ida_sort_before

6. Below is the output after applying sorting rule on the column “Category”.

alv_with_ida_sort_after

Congrats! You have successfully learned how to set Sort Order in ABAP ALV with IDA on HANA. Please stay tuned for ALV with IDA for HANA tutorials. Leave a comment in the below comment section and let us know your feedback.

The post How to set Sort Order in ABAP ALV with IDA on HANA appeared first on SAP Fiori,SAP HANA,SAPUI5,SAP Netweaver Gateway Tutorials,Interview Questions|SAP Learners.

Totals and Sub Totals in ALV with IDA on HANA

$
0
0

Hello everyone, in this tutorial you will learn how to do totals and subtotals in ALV with IDA on HANA.

♦ Prerequisites

SET_AGGREGATION( ) in IF_SALV_GUI_LAYOUT_IDA

Totals

Totals in ALV with IDA can be achieved by using the method SET_AGGREGATION( ). Using this method you can perform following aggregations

  • Sum
  • Maximum
  • Minimum
  • Average
ABAP Source code
********************************************************
*                www.saplearners.com                   *
*            Totals & Subtotals in ABAP ALV with IDA   *
********************************************************

START-OF-SELECTION.

*1.. Create object reference for ALV with IDA
*...  based on CDS View
DATA(lo_alv_display) = cl_salv_gui_table_ida=>create_for_cds_view( 
                                   iv_cds_view_name = 'zcds_total_stock' ).


*2.. Create Aggregation rule
DATA: ls_aggr_rule  TYPE if_salv_gui_types_ida=>ys_aggregation_rule,
      lt_aggr_rules TYPE if_salv_gui_types_ida=>yt_aggregation_rule.

ls_aggr_rule-field_name = 'TOTAL_STOCK'.
ls_aggr_rule-function   = if_salv_service_types=>cs_function_code-sum.
APPEND ls_aggr_rule TO lt_aggr_rules.

lo_alv_display->default_layout( )->set_aggregations( lt_aggr_rules ).

*3... Display ALV
  lo_alv_display->fullscreen( )->display( ).

Output

alv_ida_totals

Sub Totals

Sub Totals in ALV with IDA can be achieved by using both Sorting Rule and Aggregation Rule. To define a subtotal on a particular column first you need to define sorting rule by using the SET_SORT_ORDER( ) and then apply aggregation rule by using method SET_AGGREGATION( ).

ABAP Source Code
********************************************************
*                www.saplearners.com                   *
*            Totals & Subtotals in ABAP ALV with IDA   *
********************************************************

START-OF-SELECTION.

*1.. Create object reference for ALV with IDA
*...  based on CDS View
DATA(lo_alv_display) = cl_salv_gui_table_ida=>create_for_cds_view( 
                                  iv_cds_view_name = 'zcds_total_stock' ).


*2.. Create Aggregation
DATA: ls_aggr_rule  TYPE if_salv_gui_types_ida=>ys_aggregation_rule,
      lt_aggr_rules TYPE if_salv_gui_types_ida=>yt_aggregation_rule.

ls_aggr_rule-field_name = 'TOTAL_STOCK'.
ls_aggr_rule-function   = if_salv_service_types=>cs_function_code-sum.
APPEND ls_aggr_rule TO lt_aggr_rules.

lo_alv_display->default_layout( )->set_aggregations( lt_aggr_rules ).


*3.. Set Sorting rule for Subtotals
DATA(lt_sort_rule) = VALUE if_salv_gui_types_ida=>yt_sort_rule(
                           ( field_name = 'CATEGORY'
                             descending = abap_false
                             is_grouped = abap_true )
                           ).
lo_alv_display->default_layout( )->set_sort_order( 
                                   it_sort_order = lt_sort_rule ).

*3... Display ALV
  lo_alv_display->fullscreen( )->display( ).
Output

alv_ida_sub_totals

Congrats! You have successfully learned how to perform totals and subtotals in ALV with IDA on HANA. Please stay tuned for ABAP ALV with IDA on HANA tutorials. Leave a comment in the below comment section and let us know your feedback.

The post Totals and Sub Totals in ALV with IDA on HANA appeared first on SAP Fiori,SAP HANA,SAPUI5,SAP Netweaver Gateway Tutorials,Interview Questions|SAP Learners.

How to install SAP Web IDE Personal Edition

$
0
0

Hello every one, in this tutorial you will learn how to install SAP Web IDE Personal Edition on to local desktop/laptops.

SAP Web IDE

SAP Web IDE is web-based development tool used to create and extend SAPUI5 and SAP Fiori user applications for browser and mobile devices. It simplifies the application development by providing different wizard templates, plugins etc. SAP Web IDE is available as as trail/productive in HANA Cloud Platform(HCP) and local as SAP Web IDE Personal Edition.

Architecture

sapwebide_architecture

SAP Web IDE Personal Edition

It is personal edition released by SAP which can be installed on personal workstations for local development. Its main intention is to provide developers a local IDE for testing and non-productive purpose.

System Prerequisite

Operation System
  •  Microsoft Windows (7 or 8)
  •  Mac OS (>9)
Java Platform Version

JRE Version 7 or higher 64-bit

Installation Procedure

  1. Go to SAP Development Tools and select “SAPUI5” tab. Under this tab you can find the download link. By clicking on the download link an installation zip file will be downloaded.sapweide_personal_edition_download
  2. Create a new folder in C:/ drive and name it as “SAPWebIDE”. Unzip the installation file into this folder. After unzip, you should see a eclipse folder and inside this you will find all necessary file to run the SAP Web IDE.sapweide_personal_edition_unzip
  3. Now double click on the orion.exe file to run the Orion Server. If you have followed the document, you can find the orion.exe file here C:\SAPWebIDE\eclipse. You will see the below screen, if server started successfully.sapwebide_orion
  4. Launch SAP Web IDE personal edition via the URL http://localhost:8080/webide/index.html. You will see the below screen, before starting the WebIDE you need an Orion account, sign up for one in the same screen.sapwebide_orion_signup
  5. After successful sign-up SAP Web IDE personal edition will be launched.sapweide_personal_edition

The post How to install SAP Web IDE Personal Edition appeared first on SAP Fiori,SAP HANA,SAPUI5,SAP Netweaver Gateway Tutorials,Interview Questions|SAP Learners.

How to create Catalog in SAP Fiori Launchpad

$
0
0

Hello every one, in this tutorial you will learn how to create Catalogs in SAP Fiori Launchpad.

Fiori Launchpad(FLP) is the entry point to SAP Fiori Apps on mobile or desktop devices. It can configured using Fiori Launchpad Designer(FLPD).

The launchpad designer can be launched with the following URL:
https://<server>:<port>/sap/bc/ui5_ui5/sap/arsrvc_upb_admn/main.html
https://<server>:<port>/sap/bc/ui5_ui5/sap/arsrvc_upb_admn/main.html ?sap-client=<client>&scope = <CONF/CUST>

Catalog

A catalog is a collection of app launcher tiles and target mappings (actions). To create or delete a catalog you have to launch the Fiori Launchpad Designer. To know how to launch the launchpad designer click here.

Fiori Launchpad Designer

In the Fiori Launchpad Designer all existing catalog names along with the number of app launcher tiles appear on the left panel.

Create Catalog

  1. Click on Create Catalog add icon on the left panel.Create Catalog
  2. A Create Catalog dialog box appears.
  3. Choose Standard. Enter Title and ID.
  4. Choose Save. A new catalog will be created with specified title without any app launcher tiles appears in the left panel.

Delete Catalog

  1. Select any catalog from the catalog list on the left panel in launchpad designer.
  2. Drag and drop the selected catalog in the trash.
  3. Choose OK in the confirmation dialog box. The selected catalog is deleted from the catalog list.

You have successfully created Catalog in SAP Fiori Launchpad. Please stay tuned for SAP Fiori tutorials. Leave a comment in the below comment section and let us know your feedback.

Viewing all 211 articles
Browse latest View live


<script src="https://jsc.adskeeper.com/r/s/rssing.com.1596347.js" async> </script>